openrig
mvschwarz · mvschwarz/openrig
Cho phép xây dựng và điều phối các mạng lưới AI coding agent như Claude Code và Codex thành các nhóm bền vững với ngữ cảnh chung.
Xây dựng mạng lưới agent của riêng bạn từ Claude Code, Codex và Pi: các nhóm bền vững với vai trò, ngữ cảnh chung và công việc riêng.
Xem kết quả thực tế

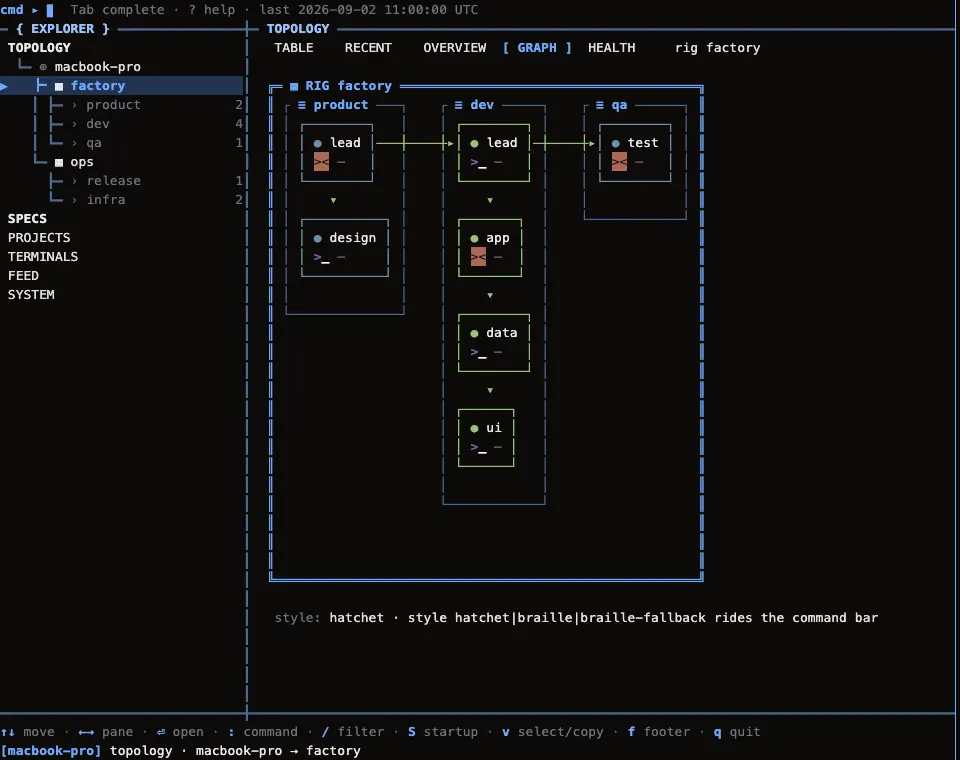
Ảnh từ README của tác giảGiao diện OpenRig TUI quản lý agent với trạng thái model và thực thi
Ảnh từ README của tác giả mvschwarz ·Nguồn
Bạn có thể làm gì với nó
- Thiết lập một nhóm nhiều agent với Claude Code và Codex để hợp tác trong một dự án coding.
- Điều phối các agent để quản lý ngữ cảnh chung và công việc bền vững giữa các phiên.
- Định nghĩa vai trò cho các AI agent trong cấu hình YAML để làm việc nhóm có cấu trúc.
Kiểm tra an toàn
Dùng được, nhưng nên đọc ghi chú trước.
- ●Trình cài đặt tải script từ xa và chạy thẳng bằng shell.
README.md
Quét tự động các file trong repo. Luôn xem lại code trước khi chạy.
Trích từ README
OpenRig
A harness wraps a model. A rig wraps your harnesses. Define your agent team in YAML, boot it with one command. Claude Code and Codex in the same rig, managed as one system.
OpenRig is open-source software for building and running your own network of agents. It turns AI coding agents from a pile of terminal sessions into a persistent, organized team. Talk to a lead agent about the outcome you want; it can coordinate specialists across teams and bring you results and decisions that need your attention. Start with a repository and one useful change, then keep the team's work and context at the same addresses.
It's the open-source system behind my AI civilization experiments.
Guide: Getting started · Stuck? Help · Questions: Q&A · Updates and demos: @_feralmachine on X
See it running
Start here: the guided first-use path: install, talk to the kernel operator, then choose a team for your first useful change.
Not setting this up today? Get the next walkthrough and occasional OpenRig updates → https://openrig.dev/follow
Install and first run
Requires Node.js 22 or 24 and tmux, on macOS or Linux. On Linux, the distribution's own Node.js can be older (Ubuntu 24.04's is 18); install a supported version with nvm (nvm install 22) or NodeSource. On a Mac with Apple silicon, use Node.js 22 (compatibility history). On Windows, use WSL2, the Windows route OpenRig supports; native Windows isn't supported. OpenRig's automated tests don't run on WSL2 yet; see one user's working setup. Launching a rig writes provider hooks and workspace trust settings. Before running the commands below, read what OpenRig changes on your machine and back up the relevant files.
One command. This runs OpenRig's install script from the v0.6.8 release. It checks Node.js and npm, installs the latest published @openrig/cli with npm install -g, runs the Node.js and SQLite check, then runs rig setup --dry-run and rig setup. The first line prints that plan and changes nothing:
curl -fsSL https://raw.githubusercontent.com/mvschwarz/openrig/v0.6.8/scripts/install.sh | sh -s -- --dry-run
curl -fsSL https://raw.githubusercontent.com/mvschwarz/openrig/v0.6.8/scripts/install.sh | sh
If a provider isn't signed in yet, the last step reports FAILED [4/4], and rig setup lists the sign-in under "Some steps need attention". If the only remaining failures are provider sign-ins, the install steps finished; sign in to each selected provider as below and continue.
Or step by step:
npm install -g @openrig/cli
rig setup --dry-run
To install with Bun instead, run bun add -g @openrig/cli. OpenRig still runs on Node.js, so install Node.js 22 as well. Bun may block this package's postinstall script, in which case the Node.js and SQLite check described under what OpenRig changes on your machine does not run at install time.
npm 11 and later can skip that postinstall script and print npm warn install-scripts naming @openrig/cli. That's expected: the CLI still works, and only the Node.js and SQLite check was skipped. To run it yourself, use node "$(npm root -g)/@openrig/cli/scripts/check-abi.mjs"; rig doctor checks the Node.js version only.
Choose the working account you already have: Claude Code, Codex, or both. Reuse an explicit choice; no second subscription is required. rig setup --dry-run previews the broader setup; applying rig setup checks both harnesses and installs a missing one, plus Herdr unless declined with --no-herdr. Pass the choice with --providers claude or --providers codex so the other reads not selected instead of failed. The one-command install above doesn't know the choice, so it installs and checks both; for one provider, go step by step and run rig setup --providers <choice>. On macOS, the installing agent offers Ghostty once. Setup leaves an existing cmux installation alone. It is optional for the selected-provider path.
A team seat with no permission policy, per-seat choice or (for Codex) named profile launches with OpenRig's team default: Claude runs ordinary rig commands, project reads and common tests without prompting, while lifecycle commands such as rig up and rig down still ask; Codex also gets the OpenRig workspace and its pod's state directory as writable directories. Before launching, your agent recommends keeping that default, and offers to remember selected OpenRig commands in your native settings only if you want that, at personal project scope unless you explicitly choose user-wide sessions. It is not global YOLO or permission to invent work. On Yes, the agent adds and verifies native rules; No or no answer keeps the team default and leaves settings unchanged. An existing explicit choice is reused. Say “Undo the OpenRig command allowances added by this setup” to remove only its additions.
If permission prompts are slowing you down, consider the workshop bundle. It ships with broad access and non-interruptive mode: its agents bypass permission prompts and supported harness warning dialogs. The listing and before-install view explain that access before you choose it.
Check tmux -V and only your selected CLI/login: claude --version plus
claude auth status, or codex --version plus `codex login stat