mcp-use
mcp-use · mcp-use/mcp-use
This TypeScript framework allows developers to build, test, and deploy MCP servers and apps for AI agents like ChatGPT and Claude with full typing and debugging.
The fullstack MCP framework to develop MCP Apps for ChatGPT / Claude & MCP Servers for AI Agents.
See it in action
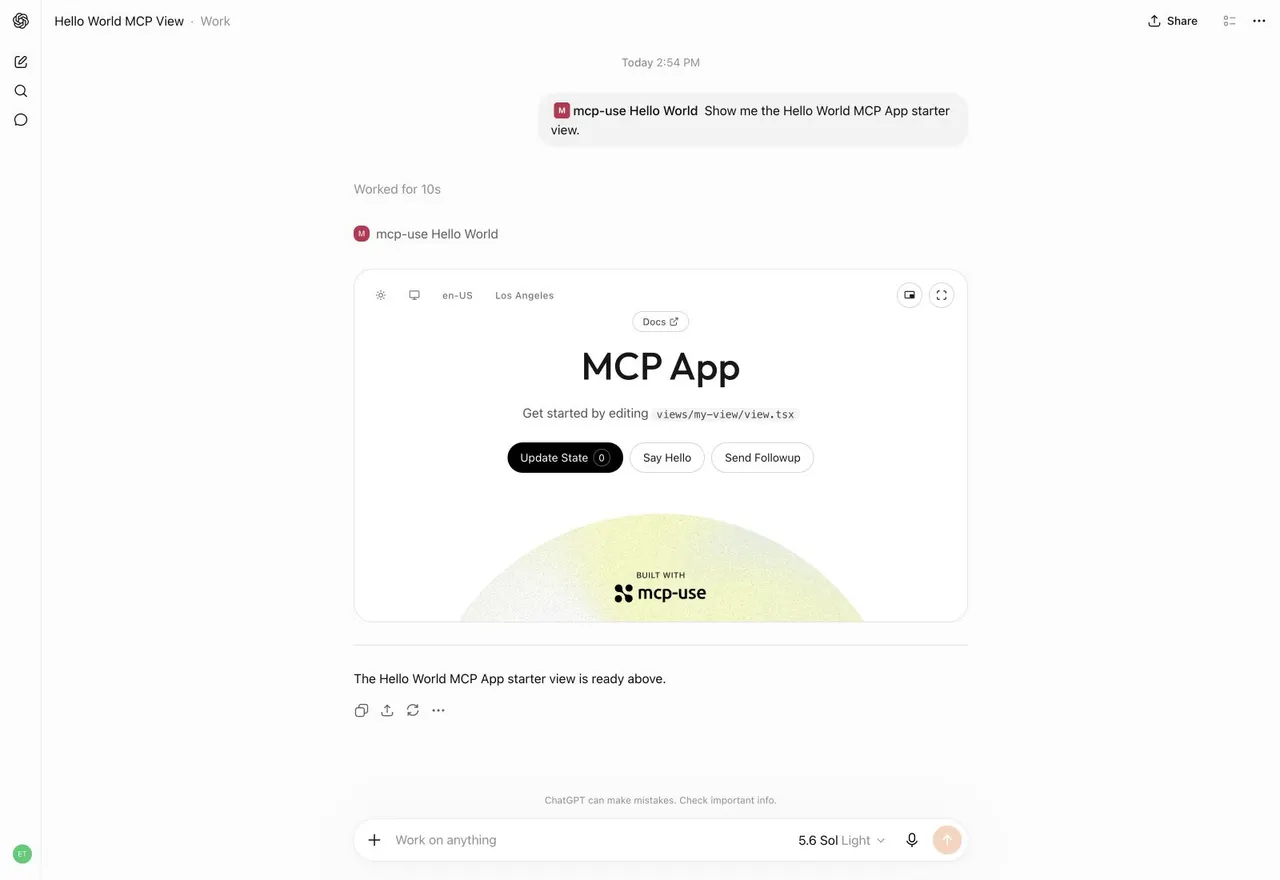
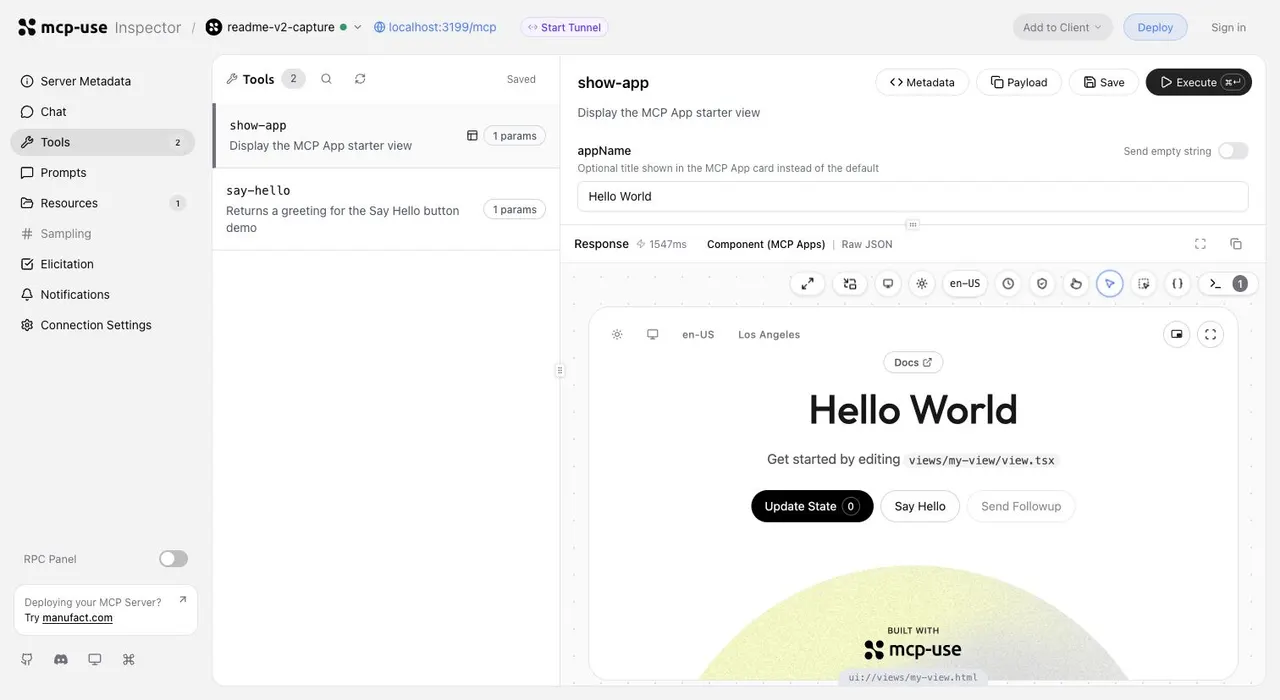
From the author's READMEHello World MCP App rendered in a ChatGPT conversation
From the author's README mcp-use ·Source
What you can do with it
- Create a new MCP server to expose custom internal APIs to Claude Code.
- Develop interactive MCP Apps with native React Views for AI agent interaction.
- Utilize the built-in inspector to debug MCP tool calls and agent interactions.
Safety check
No risky patterns found in the files we scanned.
Automated scan of the repo files. Always review code you run.
From the README
  The TypeScript framework for MCP
Build, test, and ship MCP servers, ChatGPT plugins, Claude connectors
Fully Typed, native Views and MCP Apps support, built-in Inspector and first class Agent experience.


<strong>Documentation</strong>
· <strong>Inspector</strong>
· <strong>Examples</strong>
· <strong>Deploy</strong>
[!NOTE] Migrating from v1? Give it to your agent:
Migrate this mcp-use project to v2 following
https://docs.mcp-use.com/v2/typescript/server/migration
Get started
Start with your agent
Build an MCP server: https://mcp-use.com/prompt.md
Start with code
npx -y create-mcp-use-app@latest
Run npm run dev in the generated project · open http://localhost:3000/mcp/inspector
Everything you need to ship MCP
  Fully typed
  Zod schemas flow from tools to structured results, View props, and tool calls.


  Native Views
  Bind React Views directly to tools and ship interactive apps without custom extension wiring.


  Agent-first and headless
  Scaffold, invoke, inspect, screenshot, and deploy through your agent.


  Built-in debugging tools
  Inspect tools and Views in the browser or headlessly through the CLI.
Quickstart
The scaffold gives you the server, TypeScript configuration, development scripts, Inspector, and a React view pipeline. Start it once and the MCP endpoint also serves a client-ready landing page with its connection URL and setup instructions.
Replace its index.ts with a view-bound tool like this:
index.ts — Server entry file for tool definition and metadata
import { MCPServer } from "mcp-use";
import { z } from "zod";

const server = new MCPServer({
  name: "weather-app",
  title: "Weather App",
  version: "1.0.0",
});

const weatherInput = z.object({
  city: z.string().describe("City to look up"),
});

const weatherOutput = z.object({
  city: z.string(),
  temperature: z.number(),
  conditions: z.string(),
});

export const getWeather = server.tool(
  {
    name: "get-weather",
    title: "Get weather",
    description: "Get the current weather for a city",
    inputSchema: weatherInput,
    outputSchema: weatherOutput,
    view: { name: "weather-card" },
    annotations: {
      readOnlyHint: true,
      destructiveHint: false,
      openWorldHint: true,
    },
  },
  async ({ city }) => {
    const weather = {
      city,
      temperature: 22,
      conditions: "Sunny",
    };

    return {
      content: [
        {
          type: "text",
          text: `Weather in ${city}: ${weather.conditions}, ${weather.temperature}°C`,
        },
      ],
      structuredContent: weather,
    };
  },
);

export default server;
Add Views to your tools
Create views/weather-card/view.tsx. The directory name matches view.name on the tool:
view.tsx — Return a view from your tools: React weather card
import { useCallTool, useToolContext } from "mcp-use/react";

export default function WeatherCard() {
  const { status, toolOutput, toolInput } =
    useToolContext<"get-weather">();
  const refresh = useCallTool("get-weather");

  if (status === "pending") {
    return Checking the weather in {toolInput?.city ?? "your city"}…;
  }
  if (status === "error") return Could not load the weather.;

  const weather = refresh.data?.structuredContent ?? toolOutput;

  return (
    <main style={{ padding: 24 }}>
      {weather.city}

        {weather.temperature}°C · {weather.conditions}

      <button
        disabled={refresh.isPending}
        onClick={() => void refresh.callTool({ city: weather.city })}
      >
        {refresh.isPending ? "Refreshing…" : "Refresh"}
      </button>
      {refresh.error && {refresh.error.message}}
    </main>
  );
}
Build interactive UI experiences within ChatGPT with mcp-use.
Build
Create the production build:
npm run build
Inspect
Start development mode to serve the MCP endpoint at http://localhost:3000/mcp. The Inspector is automatically available at http://localhost:3000/mcp/inspector:
npm run dev
Invoke tools, validate inputs, and inspect interactive Views in the same development loop.
Start a tunnel from the Inspector UI or run mcp-use dev --tunnel to get a public URL for your local MCP server and test it with ChatGPT and Claude before deployment. Learn more about tunneling →
Inspect the same server headlessly from the terminal, invoke representative tools, and capture a View screenshot:
npm install --save-dev @mcp-use/client
npx mcp-use client connect local http://localhost:3000/mcp
npx mcp-use client local tools list
npx mcp-use client local tools call get-weather city=Tokyo
npx mcp-use screenshot \
  --server local \
  --tool get-weather \
  city=Tokyo \
  --output weather-card.png
Deploy
Ship to Manufact and get observability, analytics, evals, submission readiness, and Git-based preview environments for free.
npm run deploy
Prefer to run it yourself? Follow the [self-hosting guide →](https://docs.mcp-use.com/typescript/server/deployment/r